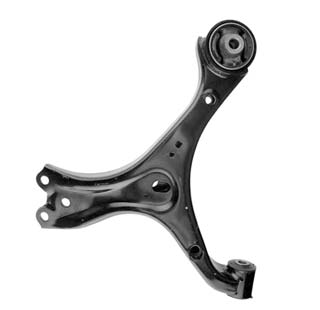
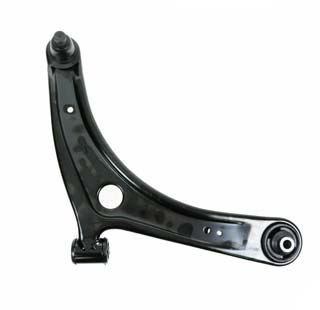
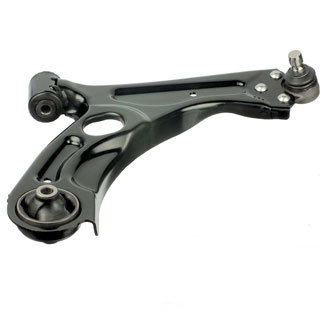
Car control arm bushings may be small components in your vehicle's suspension system, but their importance cannot be understated. These bushings play a significant role in ensuring a smooth ride, stable handling, and proper wheel alignment. Over time, control arm bushings can wear out, leading to compromised performance and safety. In this blog, we will guide you through the process of inspecting and replacing car control arm bushings to keep your suspension system in top condition.
Understanding the Car Control Arm Bushings
Before you embark on inspecting and replacing auto control arm bushings, it's essential to understand their location and function in your car's suspension system. Control arm bushings are typically found in the control arms, which connect the wheels to the chassis. These bushings allow for controlled movement of the suspension while maintaining a stable connection to the frame.
Signs of Worn-Out Control Arm Bushings
Before diving into the inspection process, it's crucial to be aware of the signs that your car control arm bushings may be worn out. Common symptoms include:
Clunking or knocking noises when driving over bumps or rough terrain.
Vibrations or excessive steering play, which can result in poor handling.
Uneven tire wear, indicating misalignment due to worn bushings.
If you experience any of these issues, it's a good indication that your car control arm bushings may need attention.
Inspection Procedure
Inspecting your control arm bushings requires raising your vehicle and inspecting each wheel individually. Here's a step-by-step inspection procedure:
Lift the vehicle: Use a jack to lift the car off the ground and secure it on jack stands for safety.
Remove the wheel: Take off the wheel for better access to the car control arm and bushings.
Inspect the bushings: Visually inspect the car control arm bushings for signs of cracking, deformation, or excessive wear. You may also want to use a pry bar to check for movement or play in the bushings.
Check for alignment issues: Look for uneven tire wear, which can be an indicator of misaligned control arm bushings.
Replacing Control Arm Bushings
If your inspection reveals that the control arm bushings are worn or damaged, it's time to replace them. Here's a general overview of the replacement process:
Gather the necessary tools: You'll need a jack, jack stands, a pry bar, a torque wrench, and replacement control arm bushings.
Lift the vehicle and remove the wheel: Follow the same steps as in the inspection process.
Remove the control arm: Depending on your vehicle's make and model, this step may vary. You may need to remove other components to access the control arm.
Press out the old bushings: You'll need a suitable press tool to remove the old bushings from the control arm.
Install new bushings: Press the new bushings into place and ensure they are properly aligned.
Reassemble the control arm: Put the control arm back in place and torque all bolts to the manufacturer's specifications.
Reinstall the wheel: Carefully put the wheel back on and lower the vehicle to the ground.
As a leading auto suspension parts company, we have to mention that inspecting and replacing car control arm bushings is a manageable task for many DIY enthusiasts. By following these steps and paying attention to the signs of wear and tear, you can ensure that your vehicle's suspension system continues to provide a smooth and safe ride. If you're not comfortable performing this task yourself, it's advisable to seek professional assistance to maintain the integrity of your suspension system.
Related SAFE Control Arms & Parts
Related News Of SAFE Control Arms & Parts
-
Control Arm
-
Honda Control Arm
- Honda Accord 1999-2003 Upper Arm
- Honda Accord 2003-2007 Upper Arm
- Honda Accord 2008-2015 Upper Arm
- Honda Accord 2009-2014 Control Arm
- Honda Civic 1995-2001 Control Arm
- Honda Civic 1996-2000 Upper Arm
- Honda Civic 2001-2005 Control Arm
- Honda Civic 2006-2011 Control Arm
- Honda Civic 2012 AT Control Arm
- Honda Civic 2012-2016 Control Arm
- Honda CR-V 1997-2001 Upper Arm
- Honda CR-V 1997-2001 Control Arm
- Honda CR-V 2002-2006 Control Arm
- Honda Fit 2015-2020 Control Arm
- Honda JAZZ 2002-2008 Control Arm
- Honda JAZZ 2008-2020 Control Arm
-
Toyota Control Arm
- Toyota Avanza 2003-2011 Control Arm
- Toyota Avensis 2001-2009 Control Arm
- Toyota Aygo 2005-2014 Control Arm
- Toyota Camry 1992-1997 Control Arm
- Toyota Camry 1997-2001 Control Arm
- Toyota Camry 2007-2011 Control Arm
- Toyota Camry 2018-2021 Control Arm
- Toyota C-HR 2018-2021 Control Arm
- Toyota Corolla Control Arm 2003-2008
- Toyota Corolla Control Arm 2006-2018
- Toyota Corolla Control Arm 2014-2019
- Toyota Corolla Control Arm 2019-2022
- Toyota Echo Control Arm 2004-2005
- Toyota Hiace Control Arm 2006-2022
- Toyota Hiace Control Arm Up 1989-2001
- Toyota Hiace Control Arm Up 1989-2004
- Toyota Hiace Control Arm Up 2004-2021
- Toyota Highlander Control Arm 2008-2013
- Toyota Hilux Control Arm 1983-1988
- Toyota Hilux Control Arm 1988-1999
- Toyota Hilux Control Arm 2005-2015
- Toyota Hilux Control Arm 4WD 2005-2015
- Toyota Hilux Control Arm 4WD 2015-2021
- Toyota Hilux Control Arm Up 1988-2004
- Toyota Hilux Control Arm Up 2005-2021
- Toyota Hilux Control Arm Up 4WD 2005-2021
- Toyota Land Cruiser 5.7 Control Arm Up 2008-2019
- Toyota Land Cruiser Control Arm 2002-2010
- Toyota Land Cruiser Control Arm 2010-2021
- Toyota Land Cruiser Control Arm Up 1998-2007
- Toyota Land Cruiser Control Arm Up 2016-2020
- Toyota Rav4 2006-2018 Control Arm
- Toyota Rav4 2019-2022 Control Arm
- Toyota Reiz 2005-2010 Control Arm
- Toyota Sienna 2004-2010 Control Arm
- Toyota Sienna 2011-2019 Control Arm
- Toyota Vitz Control Arm 1999-2005
- Toyota Yaris Control Arm 1999-2005
- Toyota Yaris Control Arm 2006-2014
- Toyota Yaris Control Arm 2014-2022
-
Mazda Control Arm
- Mazda 2 2003-2007 Control Arm
- Mazda 2 2007-2015 Lower Control Arm
- Mazda 3 2010-2013 Control Arm
- Mazda 3 2014-2018 Control Arm
- Mazda 323 1998-2004 Control Arm
- Mazda 5 2005-2010 Control Arm
- Mazda 6 2007-2013 Lower Control Arm
- Mazda 6 2007-2017 Upper Control Arm
- Mazda 6 Bent 2003-2007 Lower Control Arm
- Mazda 6 Straight 2003-2007 Lower Control Arm
- Mazda 6 Upper 2003-2007 Control Arm
- Mazda 626 1988-1997 Control Arm
- Mazda 626 1997-2002 Control Arm
- Mazda CX-5 2014-2017 Control Arm
- Mazda Tribute 2000-2008 Control Arm
-
Nissan Control Arm
- Nissan Altima 2002-2006 Control Arm
- Nissan Altima 2007-2013 Control Arm
- Nissan Frontier D22 2wd 1998-2004 Upper Arm
- Nissan Juke 2010-2022 Control Arm
- Nissan Kicks 2018-2021 Control Arm
- Nissan March K13 2013-2021 Control Arm
- Nissan Maxima 1996-1999 Control Arm
- Nissan Maxima 2009-2013 Control Arm
- Nissan Murano 2003-2008 Control Arm
- Nissan Navara D40 2006-2014 Upper Arm
- Nissan Navara D40 2006-2020 Control Arm
- Nissan NV200 2010-2020 Control Arm
- Nissan Pathfinder 1996-2004 Control Arm
- Nissan Pathfinder 2013-2019 Control Arm
- Nissan Pickup D22 2WD 1998-2004 Control Arm
- Nissan Pickup D22 4WD 1998-2004 Control Arm
- Nissan Pickup D22 4WD 1998-2004 Upper Arm
- Nissan Qashqai 2008-2015 Control Arm
- Nissan Qashqai 2013-2022 Control Arm
- Nissan Sentra 2001-2006 Control Arm
- Nissan Sentra 2007-2012 Control Arm
- Nissan Sunny B12 1986-1990 Control Arm
- Nissan Sunny B13 1990-1995 Control Arm
- Nissan Sunny B14 1995-2000 Control Arm
- Nissan Tiida C12 2011-2016 Control Arm
- Nissan Urvan 2002-2007 Upper Arm
- Nissan Urvan 2002-2013 Control Arm
- Nissan Urvan 2012-2017 Control Arm
- Nissan X-trail 2001-2013 Control Arm
- Nissan X-trail 2014-2022 Control Arm
- SUZUKI Control Arm
-
Hyundai KIA Control Arm
- Hyundai Accent 1994-2000 Control Arm
- Hyundai Accent 2000-2006 Control Arm
- Hyundai Accent 2012-2017 Control Arm
- Hyundai Atos 1997-2017 Control Arm
- Hyundai Cerato 2004-2009 Control Arm
- Hyundai Elantra 2000-2006 Control Arm
- Hyundai Elantra 2007-2010 Control Arm
- Hyundai Elantra 2012-2016 Control Arm
- Hyundai Getz 2002-2010 Control Arm
- Hyundai H100 1993-2000 Upper Arm
- Hyundai I10 2013-2021 Control Arm
- Hyundai I20 2008-2015 Control Arm
- Hyundai I30 2012-2022 Control Arm
- Hyundai Ix35 2009-2015 Control Arm
- Hyundai Santa 2001-2006 Control Arm
- Hyundai Santa 2006-2012 Control Arm
- Hyundai Santa 2013-2022 Control Arm
- Hyundai Sonata 1998-2001 Control Arm
- Hyundai Sonata 1999-2006 Upper Control Arm Rear
- Hyundai Sonata 1999-2006 Upper Arm
- Hyundai Sonata 2006-2010 Control Arm
- Hyundai Sonata 2007-2011 Upper Arm
- Hyundai Sonata 2015-2019 Control Arm
- Hyundai Tucson 2004-2010 Control Arm
- Kia Carens 2006-2018 Control Arm
- Kia Forte 2010-2013 Control Arm
- Kia Forte 2014-2018 Control Arm
- Kia Picanto 2004-2008 Control Arm
- Kia Picanto 2008-2011 Control Arm
- Kia Picanto 2011-2017 Control Arm
- Kia Rio 2006-2011 Control Arm
- Kia Rio 2012-2017 Control Arm
- Kia Soul 2010-2013 Control Arm
-
MITSUBISHI Control Arm
- Mitsubishi Grandis 2003-2011 Control Arm
- Mitsubishi L200 2005-2015 4WD Upper Control Arm
- Mitsubishi L200 2005-2015 Upper Control Arm
- Mitsubishi L300 1986-2004 Control Arm
- Mitsubishi Lancer 2002-2006 Control Arm
- Mitsubishi Mirage 1997-2002 Control Arm
- Mitsubishi Mirage Rear 1993-2002
- Mitsubishi Outlander 2002-2005 Control Arm
- Mitsubishi Outlander 2007-2012 Control Arm
- Mitsubishi Pajero 2000-2022 Upper Control Arm
-
Chevrolet Control Arm
- Chevrolet Aveo 2004-2011 Control Arm
- Chevrolet Cruze 2011-2015 Control Arm
- Chevrolet Cruze 2016-2019 Control Arm
- Chevrolet Epica 2004-2006 Control Arm
- Chevrolet Equinox 2018-2022 Control Arm
- Chevrolet Impala 2006-2013 Control Arm
- Chevrolet Malibu 2004-2012 Control Arm
- Chevrolet Malibu 2016-2021 Control Arm
- Chevrolet Matiz 2005-2017 Control Arm
- Chevrolet Sonic 2012-2017 Control Arm
- Chevrolet Sprak 2013-2015 Control Arm
- Chevrolet Sprak 2016-2022 Control Arm
- Chevrolet Traverse 2009-2017 Control Arm
- Chevrolet Trax 2013-2022 Control Arm
- Chevrolet Uplander 2005-2009 Control Arm
- Opel Control Arm
-
Honda Control Arm
- Control Arm Bushing
- Ball Joint


